Left Continue shopping
Your Order

You have no items in your cart

Promotion
Read more
Explore endless possibilities with Auzz Trinklets N Krafts
Currency

Blog / glossy accents

DT Clarinda - Mothers Day card - ssshhhh don't tell

Hi peeps, This time I have what I think is a gorgeous card for Mothers Day. I have used watercolour paint to paint in an inked image. It was fairly simple but I love the finish it gives and the messy way it looks. I hope you enjoy it.

I began by cutting out the outside frame using Spellbinders dies - Triple floral using the largest die, I cut this from a piece of cardstock (with a print on the other side) and then sprayed with Lindy's sprays in various colours to give a watercolour look. Once that was dry, I usedglossy accents to adhere small bling gems to the centre of each flower.
I then cut the inner two pieces of watercolour cardstock using the next die down in the set. the inner square frame I covered in crystallina glitter glue and used that to stick down pieces of Stampendous Frantage Shaved Ice to give that holographic look. Once that was dry I covered the entire square frame in glossy accents so that it has a glass appearance.

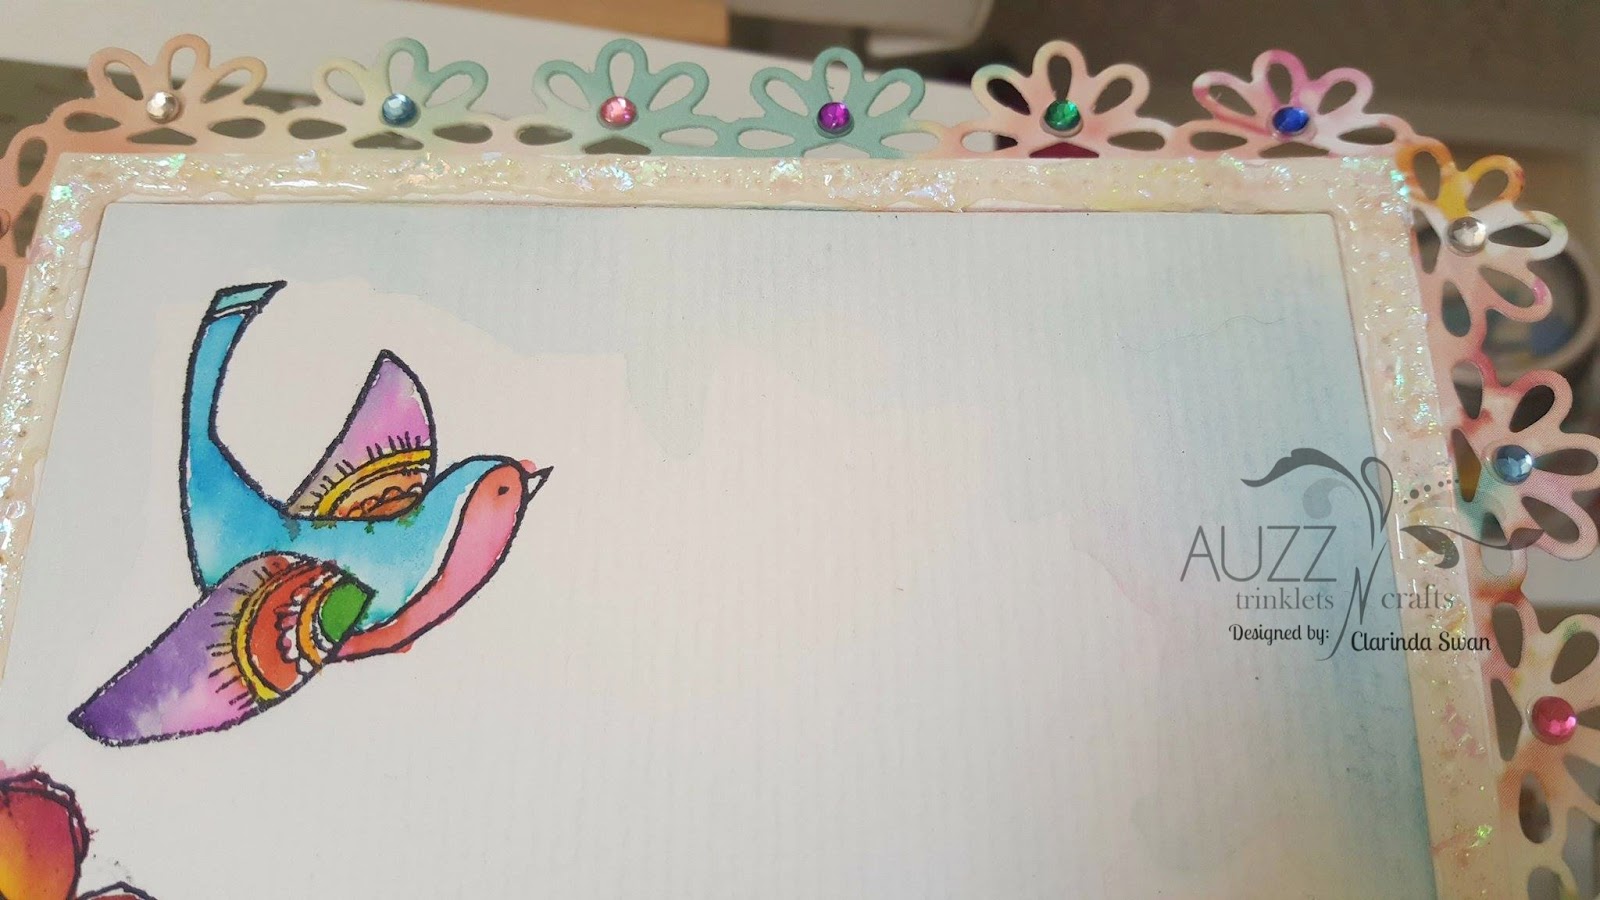
The stamps were stamped onto watercolour cardstock using archival ink. The stamp set I used was Happy Birds by CTMH. I then painted them using Kuretake Gansai Tambi watercolour pigments using a 'wet in wet' watercolour technique to ensure the colours bled into each other. Once the front was complete I used a Spellbinders Labels 4 die to cut the shape for the inside sentiment.

If you have any questions please feel free to ask.
Until next time.
Clarinda xx
Read more

DT Clarinda - a shabby card for you

Hello everyone, Welcome to April! This months theme is "Shabby" so I have made a very quick and easy card to share. This is a good one for those occasions where you need a pretty card in a hurry, and it doesn't require too many bits and pieces to make.

Firstly I chose my background papers from the Magnolia Lane collection by Ultimate Cragfts and cut them to size. The biggest one was cut to match my card base then the other two were made slightly smaller. As I was assembling the card I decided on an extra layer which is not in this picture... I then roughened up the edges (I use my stanley knife, but there are lots of distressing tools available) and I edged them lightly with Distress ink in Vintage photo.

Once that was done I began making the flowers. For this I used paper by prima and my minds eye. Once I cut the flower petals in multiple sizes using Rose Creations by Spellbinders I inked the edges with Versa Magic Chalk ink in Pink Petunia for the flowers, and the leaves in Hint of Pesto. Once inked I used my foam piercing mat by We R Memory Keepers and my petal shaping tools to give the petals and leaves shape.

I then glued them all together using Glossy Accents. Once dry I added assorted beads into the centres and adhered them with Glossy Accents. Then I layered them all together and added a sentiment from another sheet of the Magnolia Lane paper collection. I also added a lace doily from stampin up to finish it off. Thank you, I hope you enjoyed this post :) Till next time. Clarinda xx

Read more

DT Clarinda - Romance 2nd post

Hello Everyone!!

It is DT Clarinda here with my second contribution for February. This months theme is Romance. So with that in mind, it is my 20th wedding anniversary next month so I thought I would take this opportunity to make my hubby an anniversary card to celebrate.

Here are a couple of photos that show most of the items I used. I will list them all at the end of the post.

I began by stamping the image (whimsy stamps - bird swing) onto watercolour paper using Memento angel pink ink so that the image would have a 'no lines' finished look. I then painted the image using Kuretake Gansai Tambi watercolours - I have many different watercolour sets, but this is by far my favourite. The background was painted using a wash of Lindys colour spray - Merci beaucoup mint.

I then ran this through the bigshot using a circle die. I cut a frame using a round rose frame die (unbranded) and glued them to my backing sheet which came from the Magnolia Lane paper collection from ultimate crafts. The large pink flowers started out white. I used the wicking method to colour them with bubblegum pink dylusions ink spray and then added glossy accents to the petals and rubbed them in ultrafine glitter.

I like to adhere bulky items to cards and LO's using the Finnabair 3D matte gel. It dries clear but flexible so will not crack off if the card is bent. I cut a small piece of cheesecloth and died it with Lindys stamp gang spray in curiouser chartreuse. I also edged the yellow flowers using Dr PH Martins Bombay ink in white. I then stuck it all down.

I finished it off by inking all the edges in Versa Magic chalk ink - Persimmon and Oasis Green and Kaisercraft ink in Berry and backing it in a matching colour. I then added the words LOVE YOU using washi tape by recollections.

Thank - you for visiting, see you next month.
Clarinda xx
Tools:
  • Big shot
  • Scotch tape glider
  • Acrylic block for stamps
  • Stamp - Whimsy stamps - bird swing
  • Circle die
  • Rose frame die
  • Stanley knife and metal ruler
  • Aqua brushes
Consumables:
  • Color splash watercolor and word washi tape - Recollections
  • Tombow clear glue
  • Memento ink - Angel pink
  • Watercolour paper
  • Kuretake Gansai Tambi watercolours - 36 pan
  • Magnolia lane paper pad
  • Ultra fine glitter
  • Glossy accents by ranger
  • Lindys sprays in merci beaucoup mint, curiouser chartreuse and T-bird turquoise
  • Dylusions ink spray in bubblegum
  • Bombay white india ink by Dr PH Martin
  • Versa Magic chalk ink - Persimmon and Oasis Green
  • Kaisercraft ink in Berry
  • Finnabair 3D matte gel.
Read more