Left Continue shopping
Your Order

You have no items in your cart

Promotion
Read more
Explore endless possibilities with Auzz Trinklets N Krafts
Currency

Blog / AEP

Altenew Creative Watercolor Media

Altenew Creative Watercolor Media

Hi Everyone,
Today I am here to show one more project for Altenew. For this purpose I have selected another one of my favorite Class Creative watercolour Media.
For this project I wanted to try and improve my coloring techniques by using the Altenew Watercolour Palette and Altenew Water brush Pens.
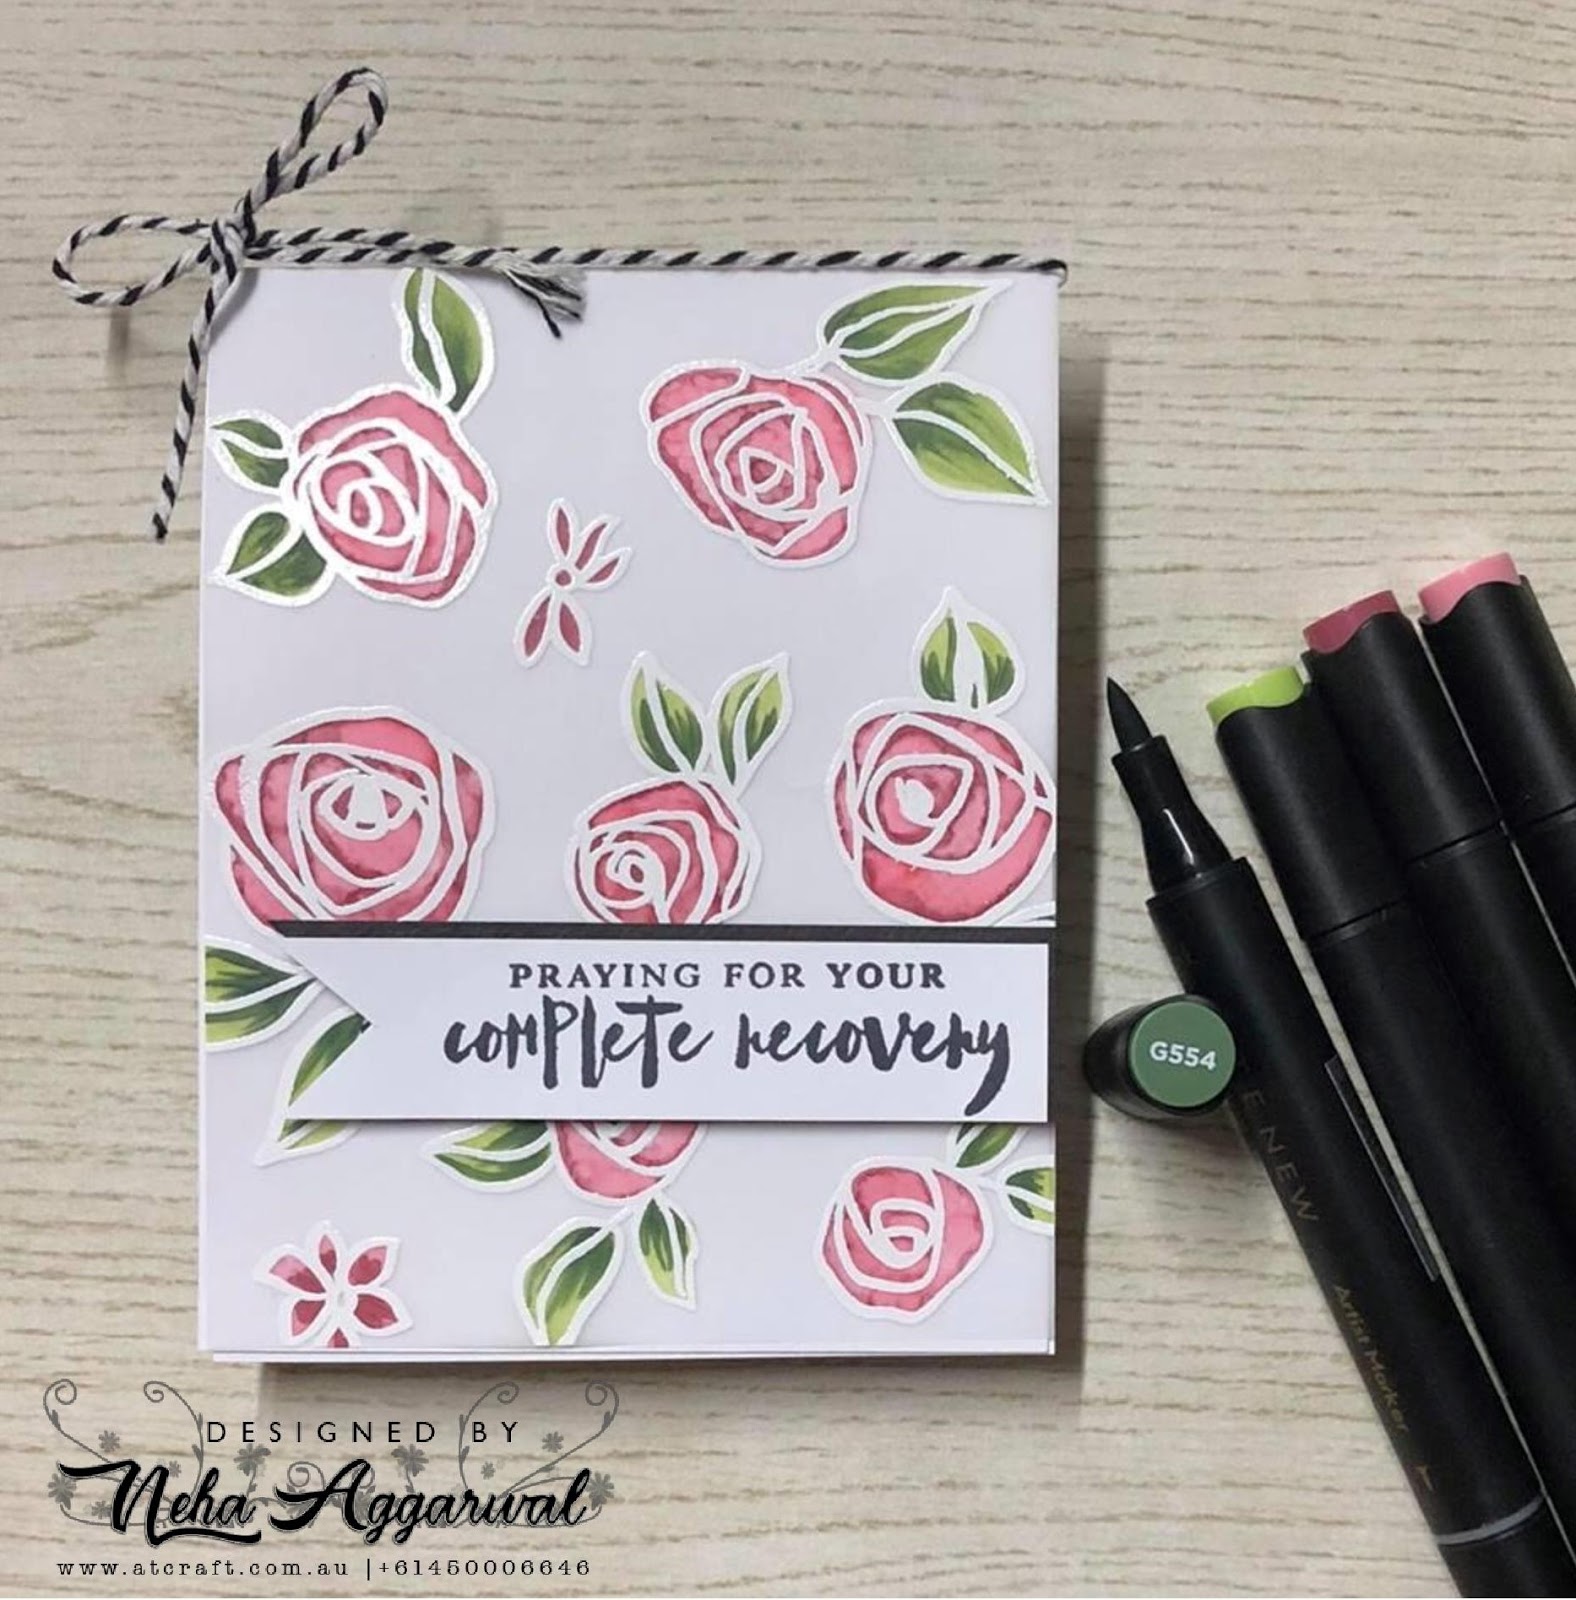
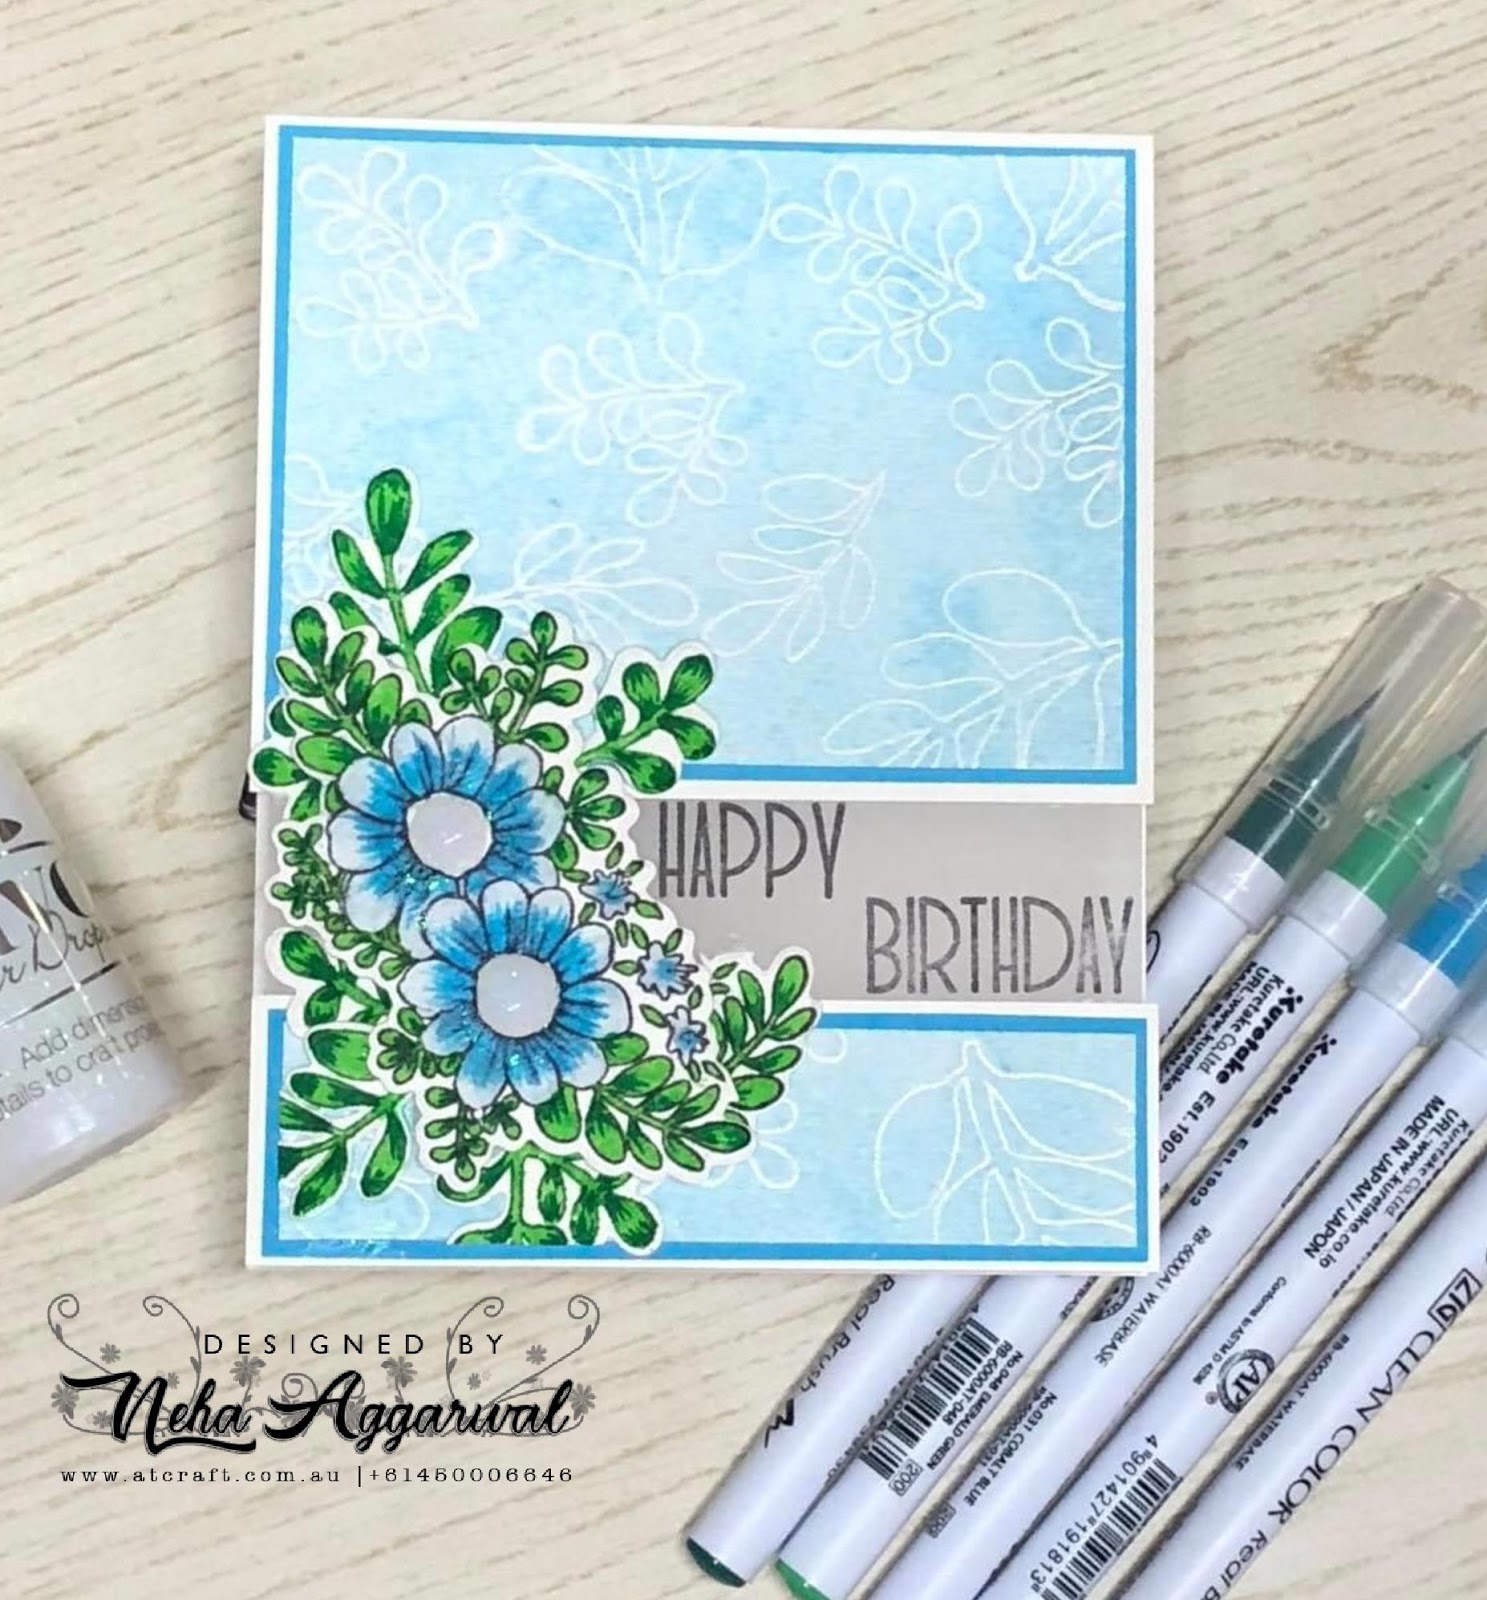
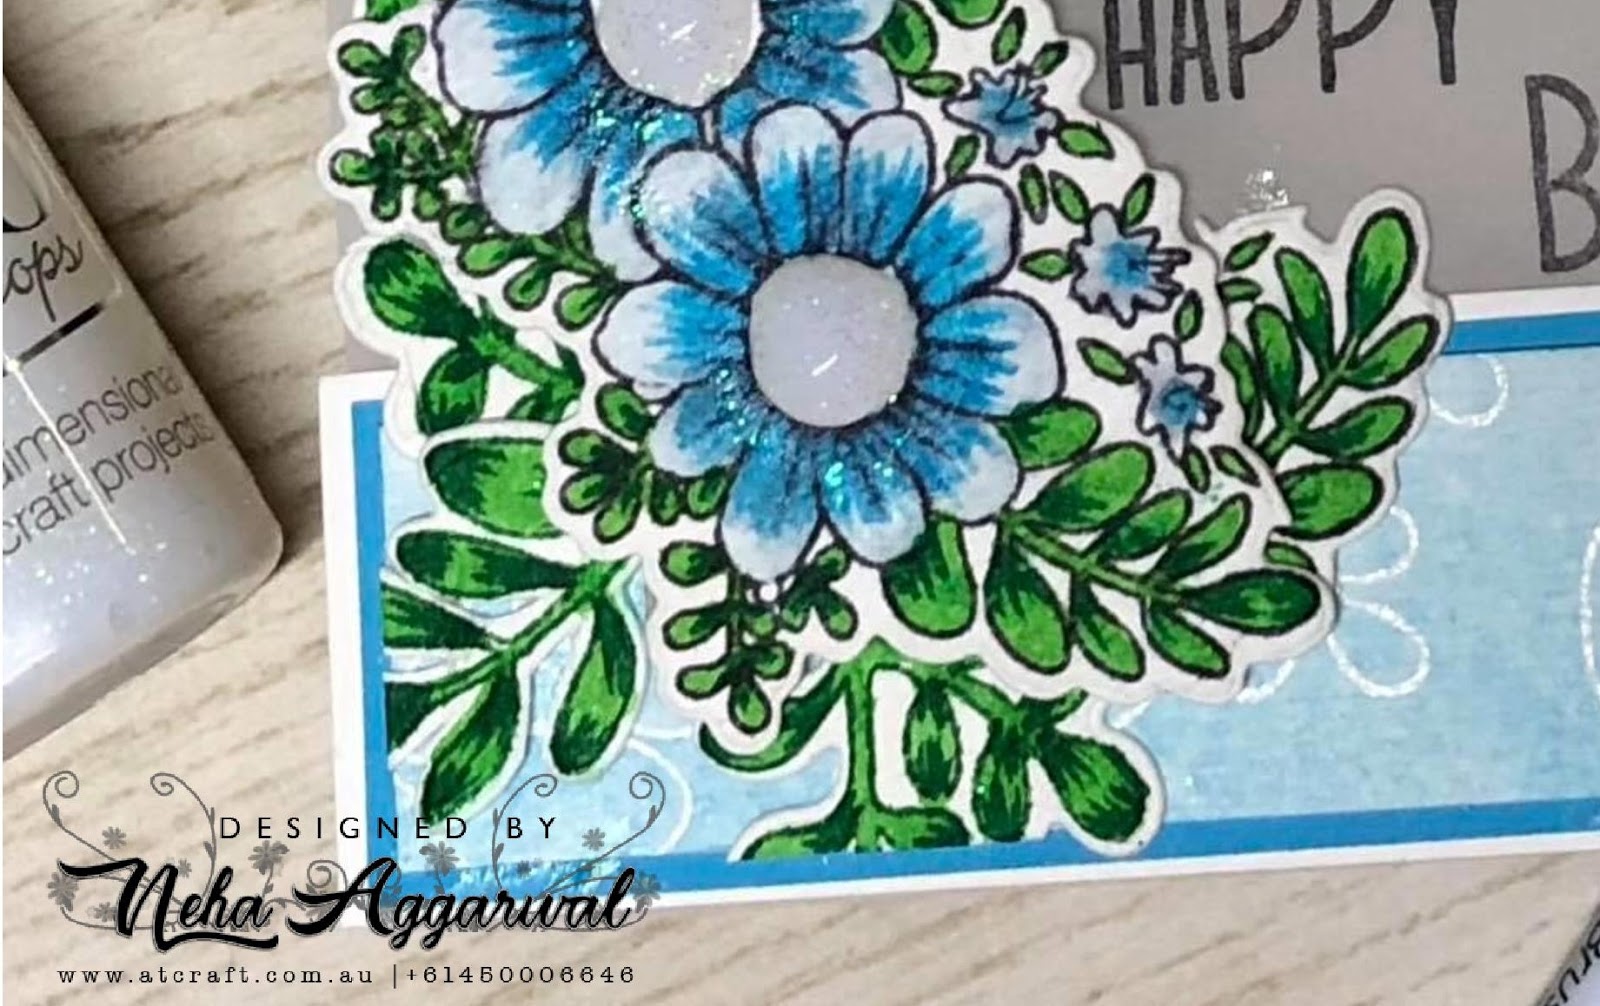
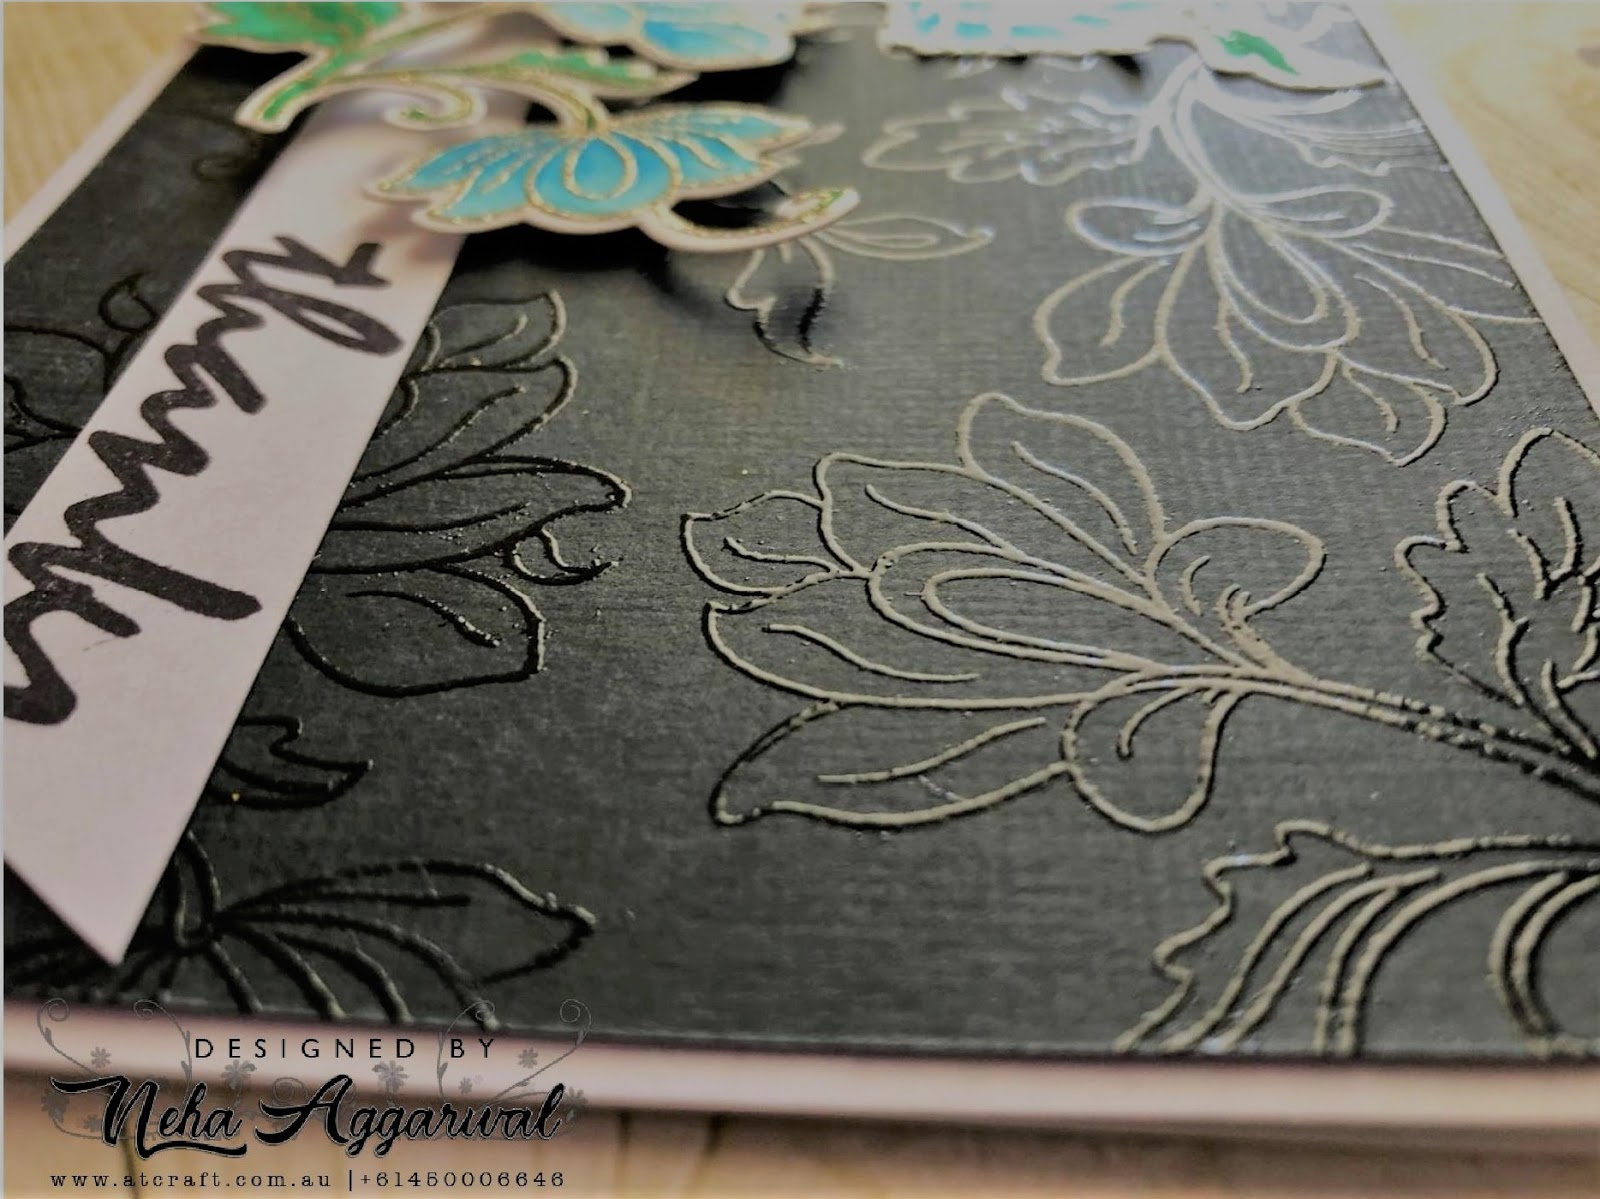
I have used the stamp sets Build-A-Flower: Anemone Coronaria and for the sentiment I chose my "happy" word from the Script Words 2. " for you" is from the halftone happy stamp set.

Basic Techniques and Process for making this Card:

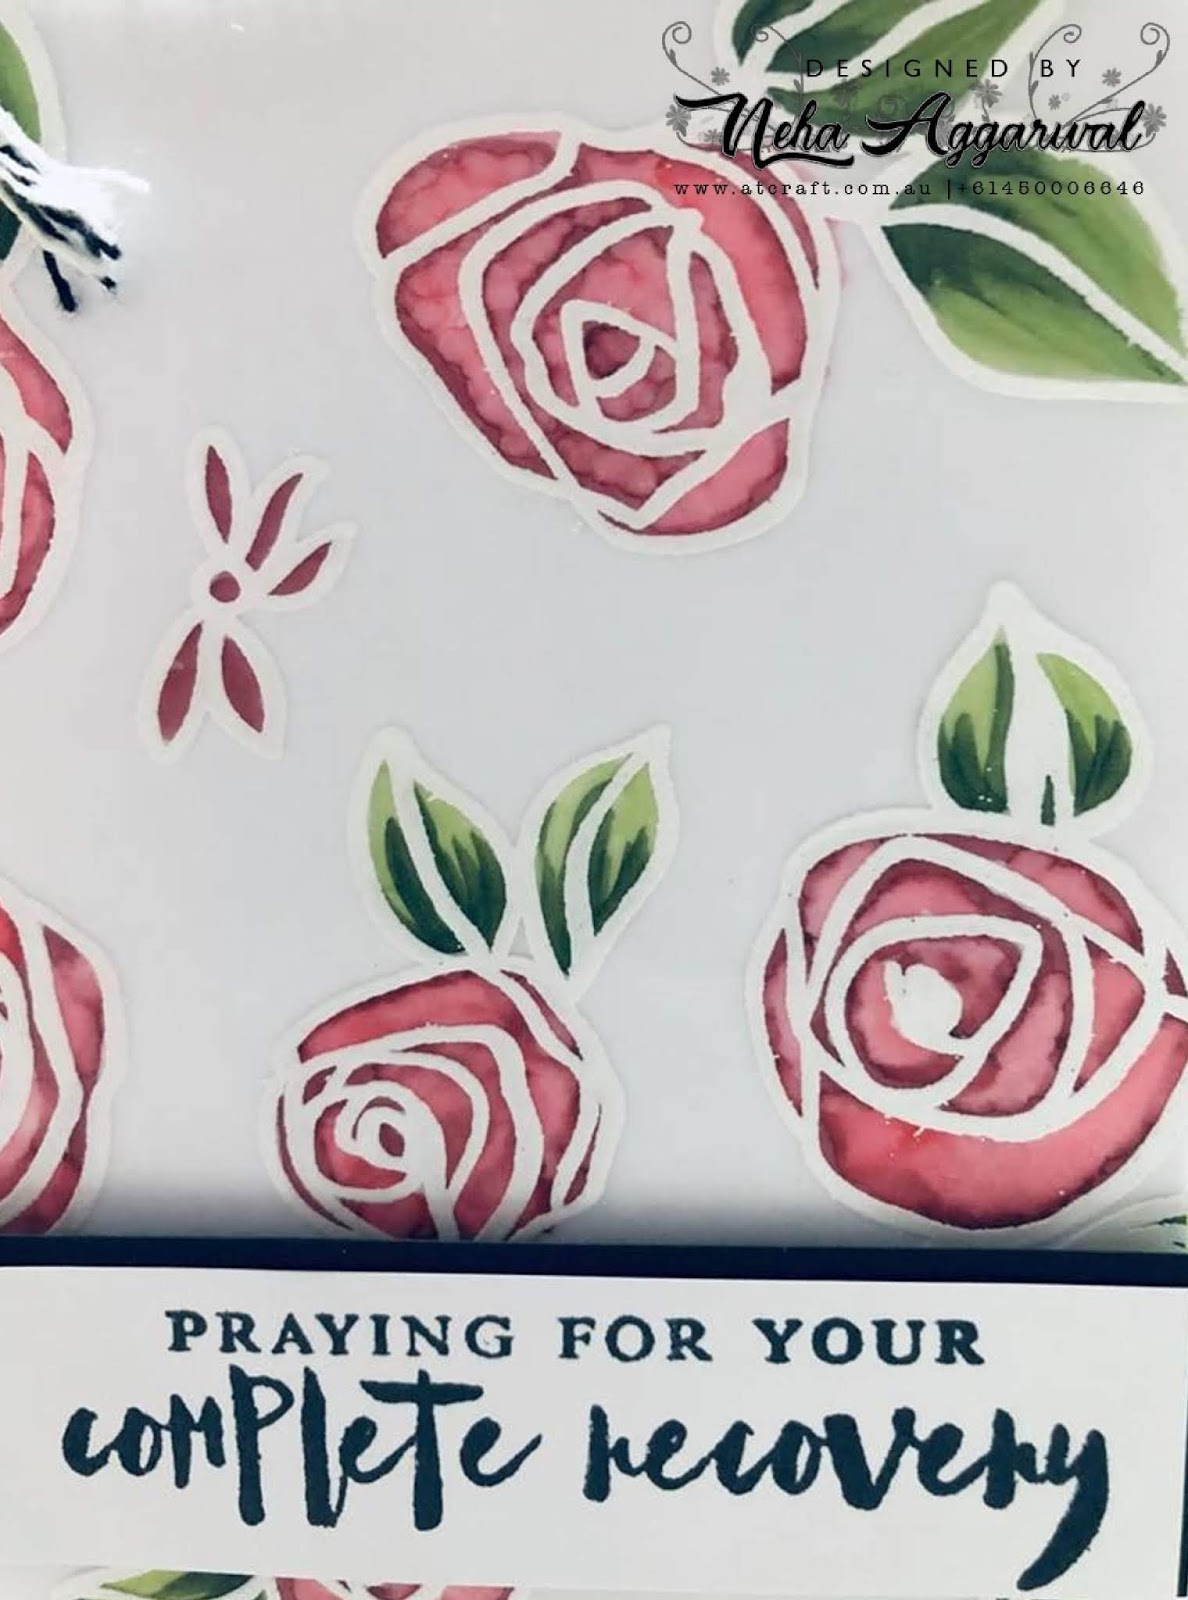
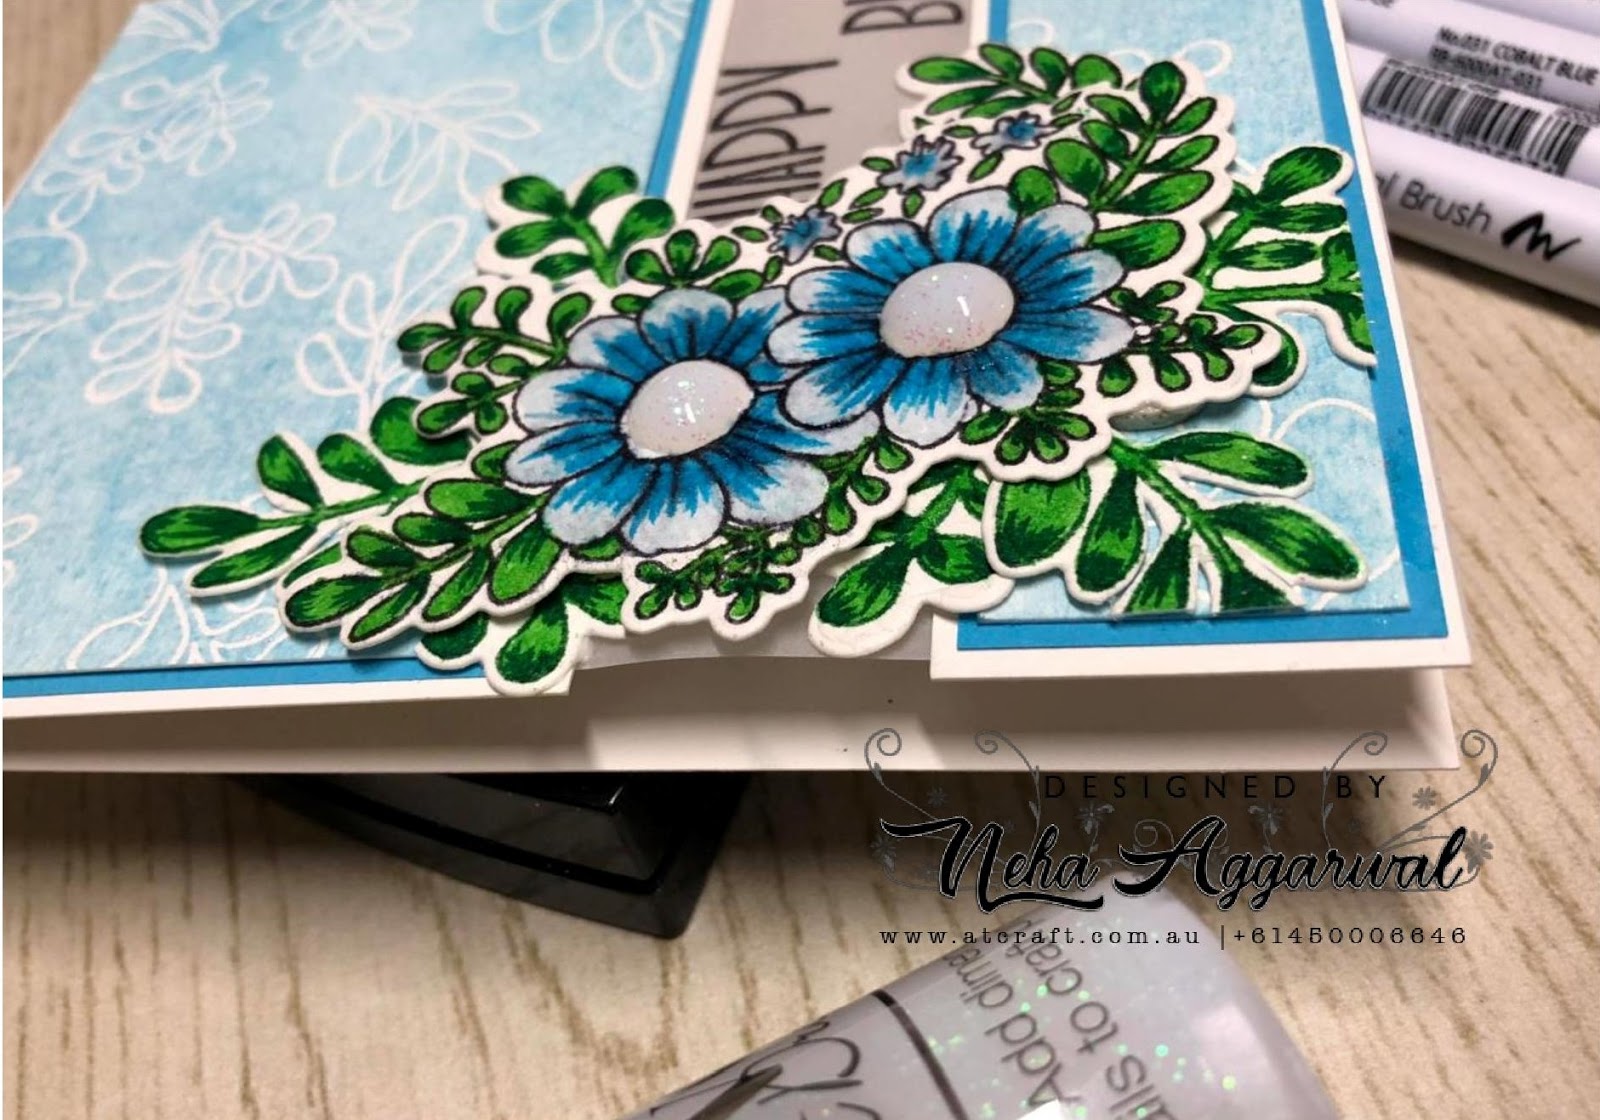
  • For making this card , I have used the basic technique of masking.
  • First I planned how many flowers I want on the top and then stamped them randomly on my strathmore Watercolor Paper Cold press using distress ink Antique Linen.
  • Once I have got my top flowers I masked them with the flowers which I got by stamping them on a paper separately and fussy cutting them out as I wanted no white background in the flowers.
  • I have done the same techniques for the leaves as well and masked few to see the over lapping ones coming underneath the flowers.
  • After I was happy with my stamped images I started my coloring process.
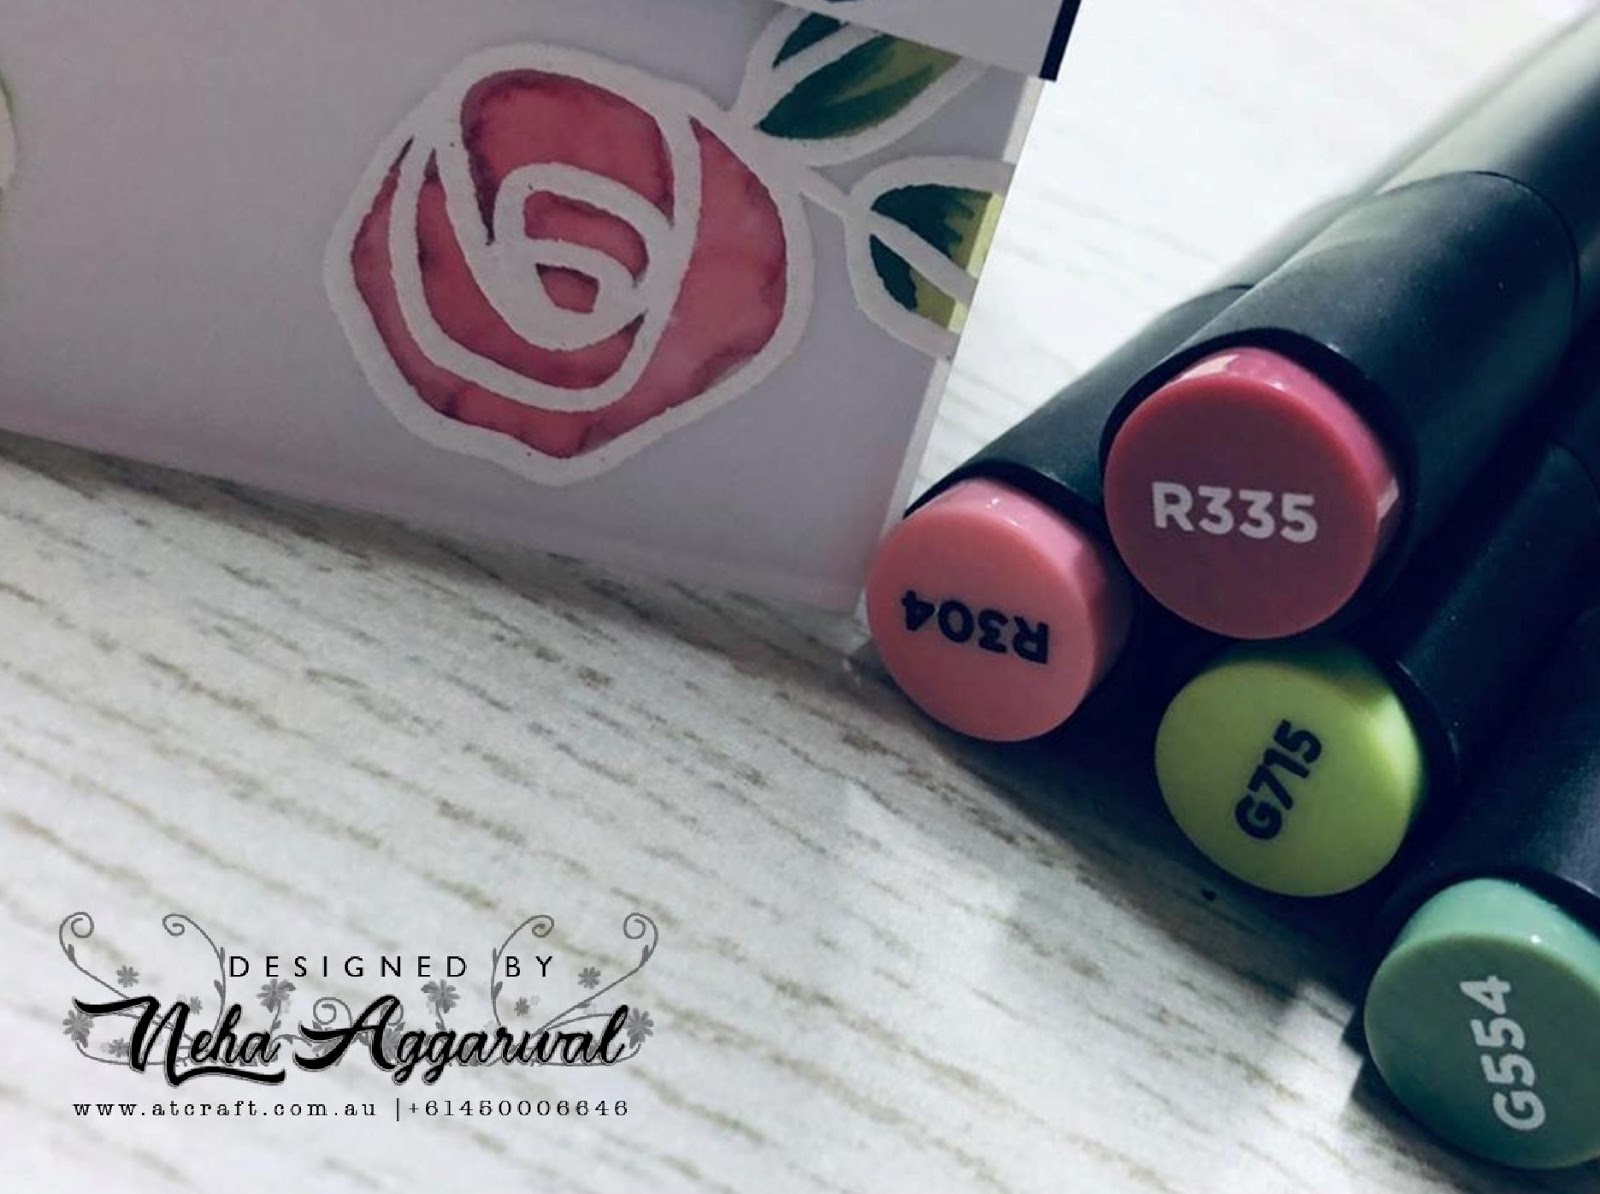
  • Foremost I did a brown water wash outside my outline images. So spreading the brown outline with more water.
  • Then slowly and patiently I started doing every alternate petal at a time so that they are not wet as when I do the petal in between the two I did before.
  • For the middle of the flowers I did black dots with watercolor.
  • For a bit of enhancement I also splattered some white with my brush.
  • My sentiment "happy" was cut two times on white card stock and 1 pcs in gold glitter card stock to have a raised effect.
  • "for you" I stamped with the Altenew New Antique Gold Pigment Ink on a black card stock.

Its amazing when you are challenged with something out of your comfort zone and try something new. I really would like to Thank Virginia and Erum for their support and love.
I look forward to create more and present myself more under their beautiful guidance.
Hope you all like it.

Regards

Neha

Read more

Altenew Zentangle for Cardmakers

Zentangle for cardmaker! what an amazing class it was. I have done few cards before with zentangle but never had a chance to finish them. Few tips and tricks learned with Amber Davis at the Altenew Academy was just on spot to full fill all needs.
Today I created a card with Zentangle. For this Card I have used the Geometric landscape which is a new release from Altenew. As soon as I saw this stamp I thought this would be perfect to do some zentangle. Along with this stamp I have also used Altenew Henna Element set.
So here I am with my card.

Here is the process on how I have created this card.
First I took a stamp from the Henna element and stamped them in a diagonal pattern on Nina Solar white along with its leaves. On a masking sheet I stamped flowers and leaves to cover the stamped images which I stamped on Nina solar white.

Now comes a bit of tricky part. The stamp was 6x6 so I had to bit struggle and expanding my lines with geometric pattern, I made a boo-boo but with Zentangle everything was hidden. First I stamped the 6x6 Image pattern and then I moved my paper little on right side so that I can stamp the 1/4 of the stamp again .Below is my picture which will show you what exactly I did.

All the lines which went missing from my this image I did create them when I started with my zentangle on it.
Once everything was finished I managed to die cut my sentiment happy cutout 4 times on a back cardstock to layer them on top of each other and used "Birthday" from Birthday builder stamp set.To finish it I just added few bits of sequins to add sparkle to finish.

Hope you all like my card and would love to join Amber for her beautiful class for some more fun and learning.

Untill next time.

happy Blogging

regards

neha

Read more
Altenew as Easy as ABC with Therese Calvird

Altenew as Easy as ABC with Therese Calvird

An amazing month of April started with Altenew class in Melbourne with Tasnim and Therese. Finally I got to meet them in person.
Now coming to my second last lesson for AECP. For this lesson I took Therese Calvird class at the Academy called Easy as ABC.
The Lesson was all about to make the best use of your Alphabet stamp and Dies. With the help of Therese Video here is what I have created.

For this card I have used Botanical You stamp set. And for making the best use of this stamp, I have used all the sentiments which were in this stamp set. Created my background with heat embossing. I have also used the layering word "you" with heat embossing.

After finishing my heat embossing I have used Picket fence Blending brush to do my background . I have used the ink pads from Altenew which are lagoon, Volcano lake, and Mountain Mist.

After completing I die cut out my word 'You' from the base base cardstock as well as the leafy YOU with the help of the coordinating dies. I mounted the leafy YOU with the foam to give extra dimensions so that they look like popped out from the base.

To finish my card I added a strip of sentiment heat embossed again on a black strip.
Hoping to finish my last lessons soon with my AECP.
Regards

neha

Read more

Watercolor Basics & Beyond using my watercolour Pan as Ink

Welcome back to my blog.
Today, I am sharing another technique which I learned from Jennifer Rzasa. Absolutely amazing technique. In this one I have used my pan colours as my inks and spritzing with water before stamping. The results are really beautiful.

For this card , I used the stamp set called Dainty bouquet stamp. First taking the big stamp on my acrylic block and using the teal colour along with the waterbrush pen I applied it on my stamps. TIP: make sure when you are lifting the colour it should not be watery otherwise it will get smudged when stamped therefore it should have lot of pigment in it.
Once I finished doing with my large one . I placed the big one in such a way that they look like one stem and did all the same step as the first one.
Once I applied the colour I sprayed a bit of water on it so that the dry colours are all reactivated.

Now with the layering of just the flowers I have used the second medium and darker teal from my ink pads to have their layers stamped on top of each other.

For my sentiments I have used it from Build-A- Flower camellia with a jet black ink. Also a bit of splatter with black was done to finish the card.
Hope you all like it.

Don't forget to leave me some comments.

regards

neha

Read more
Altenew Creative Watercolor Media

Altenew Creative Watercolor Media

Wow ! finally onto my last card for my level 2 Altenew Educator Program.
Today I am sharing the card which I created after learning from the Guru's of Altenew Jennifer Rzasa, Debby Hughes, and Laura Bassen. Wow their online class Creative water color media is just amazing.
So many different ways you can color your images by just using Altenew's ink pads or re-inkers .. yes I am right just re-inkers.
At the end of this blog post I have also attached a small experiment I did with my re-inkers. O what a fun!
So here I am with my Card where I have used Canson watercolor Paper , Peach perfect re-inker for my background and flowers from Altenew Disty Print Stamp. Images are colored using ink pads and water brush pen.

For my Background ,I took a piece of canson cardstock. Then I took out few drops of re-inker on my Glass media mat and sprayed water over re-inker drops . With the help of a water brush pen I tried to lift and dabbed the ink on my paper gently everywhere (I had sparyed lots of water on my mat over the reinker drops) as I wanted a very light colour for my background.
Ones the background is dry I used a gold embossing powder to heat emboss my Ditsy print stamped images.

For colouring my leaves and flowers I firstly dabbed a colour on the mat and then picked them up with my water brush pen to paint my flowers.
Now my sentiments are from halftone everything stamp and dies where I used a royal blue cardstock along with white to cut them out and used foam tape to adhere them . From the same coordinating stamp set , I have also stamped "Thanks for" with Persian blue ink pad .
Last part of the card was a bit of enhancing my flower center which I did with some diamonds lying in my stash.

Hope you all liked it .
Oh! before I forget , here is my experimented work or you can say a background I created with the re-inker on a glossy card stock.

Hope you all like it.
Please don't forget to leave me a comment as its boosts my morale to create more for sure.

Regards

Neha.

Read more
Altenew Magical Markers

Altenew Magical Markers

Before I started this card I was very scared as I am not at all a colouring girl.
When it comes to coloring with alcohol markers I am one step back. But in the class with Sara Naumann , she made it look so simple to work with the Alcohol markers that I have given my try to it and vola!! I really liked my card. So below is my work with the makers.

She told us about various ways in which we can make use of our alcohol markers, So I have used them on Vellum.

I have cut a card base out from Neenah solar white in a size of 4 1/4' x 11' and scored at 5 1/2' and another piece of vellum , cut to a size of 4 1/4' x 5 1/2'. I have used Altenew Bamboo Rose stamp set and heat embossed it using white embossing powder on vellum.

Then I used Altenew Marker R304 and R335 for flowers and G715 and G554 for leaves .
For my flowers and leaves I have coloured on the other side of embossed side and used the pouncing technique to colour them.

Now I took the vellum which I just colored and stick on to the card base. I have used the sentiment from the same stamp set and stamped on a white flag strip, giving it a black shadow with a black cardstock strip.
Hope you all like it.
Don't forget to leave your comments below

Regard

neha

Read more
Altenew With a twist

Altenew With a twist

Coming back to home, after having a nice break is certainly is relaxing !
2019 has arrived and first month is already gone. Time is running so fast isn't it?
Now coming back to my Altenew's world of Creation. This card is about a twist techniques which I have learned from the beautiful instructor Therese Calvird .
I have created a Birthday card using Altenew Dearest Friend Stamp and Dies by trying to do a unusual cut on my card.

In this, my base card is using Neenah Solar white cardstock along with Vellum (on which you can see the sentiment) and Blue colour cardstock.
I first stamped my flower image seperatly on the canson watercolor cardstock and then die cut it along with the few seperate leaves which were provided in the set. For coloring I have used my Zig Clean real brush markers.
Now coming on to the background. I simply took the leaf stamp from the set and randomly stamped them on neenah solar white with my versamark ink pad and then used white embossing powder to heat set. Once its cooled down I took my picket fence Life changing Blending brush along with Tim Holtz Salty ocean Distress ink for my background blending on top of the embossed leafs.
Once the background is done I simply cut it in two parts and matt it with blue cardstock as well as sticking both pieces on vellum as a base.

I took my stamped flower image and stuck it on the side of the card in between both the pieces with the double sided foam dots and stuck all my extra leaves underneath giving it more greenery.
Then I added the sentiment from the Stamp set called Birthday Builder stamp set with my Staz on Ink.

For the middle of the flower which I was bit hesitant in coloring so I used Nuvo Glitter drop white to finish my card.
Hope you all like what I created.
Look forward to see your beautiful Comments.

Regards

Neha

Read more
Altenew Heat Embossing card

Altenew Heat Embossing card

Hello Everyone,
Hope you all are having nice crafting week.
I am back with another card which I did for AECP Level 2 with Heat Embossing. Likewise the masking techniques I enjoyed this technique of playing with my embossing powders.
In this card I have made a background with my Persian motif stamp using clear embossing powder and then I coloured two flowers with my Zig markers to make as a toppers
In my card I have used Altenew Persian Motif stamps along with the dies , Many Thanks Stamp, Gold Nuvo embossing powder, Ranger Clear embossing powder.
This picture does not clearly show my back ground . So here is a pic for the background.
Hope you all like it. Please keep leaving your lovely comments below.
Happy Blogging and Crafting.
Regards
Neha
Read more

Altenew Clean & Simple Boutique Cards

Hello everyone
I am back again from my New Zealand break which I went last week. In fact it was not a holiday, I went there to help my sister for her exhibition for SENZ2018 ( Scrapbook Expo).
Coming back to Altenew card which I created today is for AEP ( Altenew Educator Program).
Here I was meant to create a simple Boutique card and below is my take for the same.
I have created this card using Altenew's Golden feather Stamp along with their Simply hello die for the word Hello.
I have used Deco foil sheet to cover my hello with copper foil shine. I have just used a simple laminator (bought from Kmart) and some clear embossing powder to stick my foil sheet on my die cut.
For my Inks I have used Altenews Mini Ink cube set warm and Cozy.
Hope you all like it. will be back soon with my another make.
Thanks for stopping
Have a lovely day and happy blogging.
Regards
Neha
https://atcraft.com.au/shop/ink-pads-and-reinkers/altenew-warm-cozy-ink-pads-pack/ https://atcraft.com.au/shop/stamps/altenew-golden-feather-free-shipping/ https://atcraft.com.au/shop/cardstock/neenah-110lb297gsm-classic-crest-cardstock-8-5x11-pack-of-50pcs/ https://atcraft.com.au/shop/cardstock/neenah-80lb-classic-crest-cardstock-8-5x11-pack-of-25pcs/
Read more

Die Cutting Techniques with Altenew Dies

Hello Everyone,
I am here again with my another card created for AEP ( Altenew Educator Program).
Today I have tried my hands on the dies from Altenew layering die which is Layered Blossom Cover Die A and B.
Here are the results.
For this Card I have first used my Layered Blossom Cover Die A to first emboss on a purple cardstock and then after cutting out from Cover Die B I have used the negative die cuts to give a light shading for my flowers. For the leaves as well I used all the negative die cuts and outlines to make it look more leafy.
Quick and easy tutorials and multi use of dies are so effective , I couldn't imagine . All in all it was yet another fun lesson.
Hope you like my card. Please do leave a comment for boosting my morale :)
Regards
Neha
https://atcraft.com.au/shop/die-cutting/altenew-layered-blossom-cover-die-a-b-bundle-free-shipping/
Read more