Left Continue shopping
Your Order

You have no items in your cart

Promotion
Read more
Explore endless possibilities with Auzz Trinklets N Krafts
Currency

Blog / auzz Trinklets N Crafts

Altenew Educators "Giving Thanks" Blog Hop and Linky Party + Giveaway

Altenew Educators "Giving Thanks" Blog Hop and Linky Party + Giveaway

Hello Everyone,
Hope you all are enjoying the blog hop . You have just arrived from the blog of Nancy McClelland

Today I have another project for Altenew Educator Blog hop.
Before going on to my project , I would like to thank all the front line workers who are working for all of us during this pandemic event.
For this purpose I have created a card to Thank everyone.

Altenew Build a Flower Begonia

Materials :

For this card I have used the following materials.

  • Altenew Watercolor Brush Markers
  • Altenew Permamanet Ink
  • Altenew mini ink cubes
  • Altenew Adhesive runner
  • Black cardstock
  • White Neenah cardstock
  • Black fine point pen
  • White embossing powder
  • Versamark Ink
  • Beautiful day Stamp and dies
  • Build a Flower begonia
  • Many thanks Stamps


Steps:

For my background I have created a video for you all to have a look how I created that.
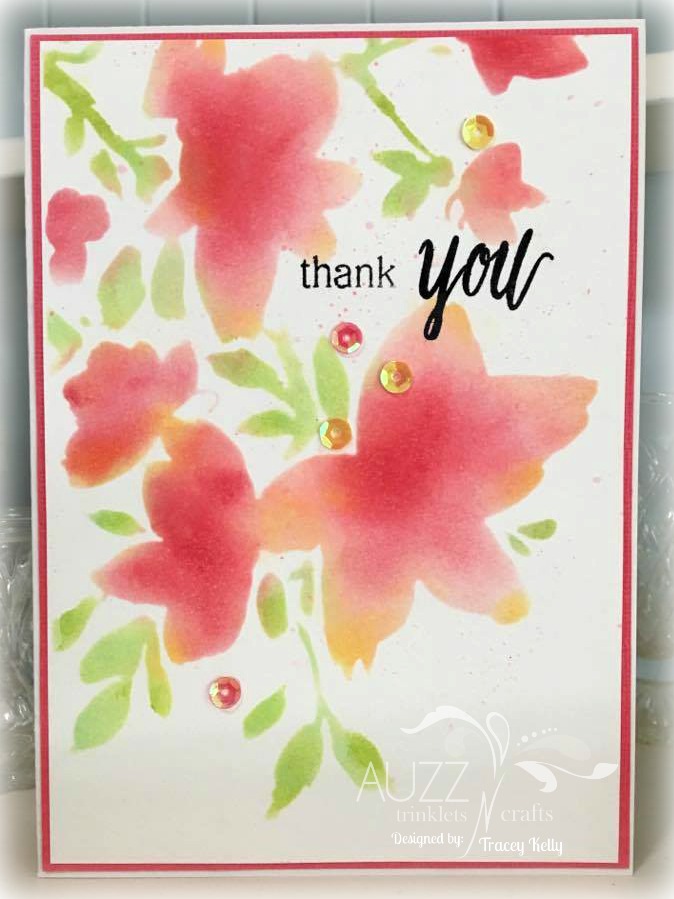
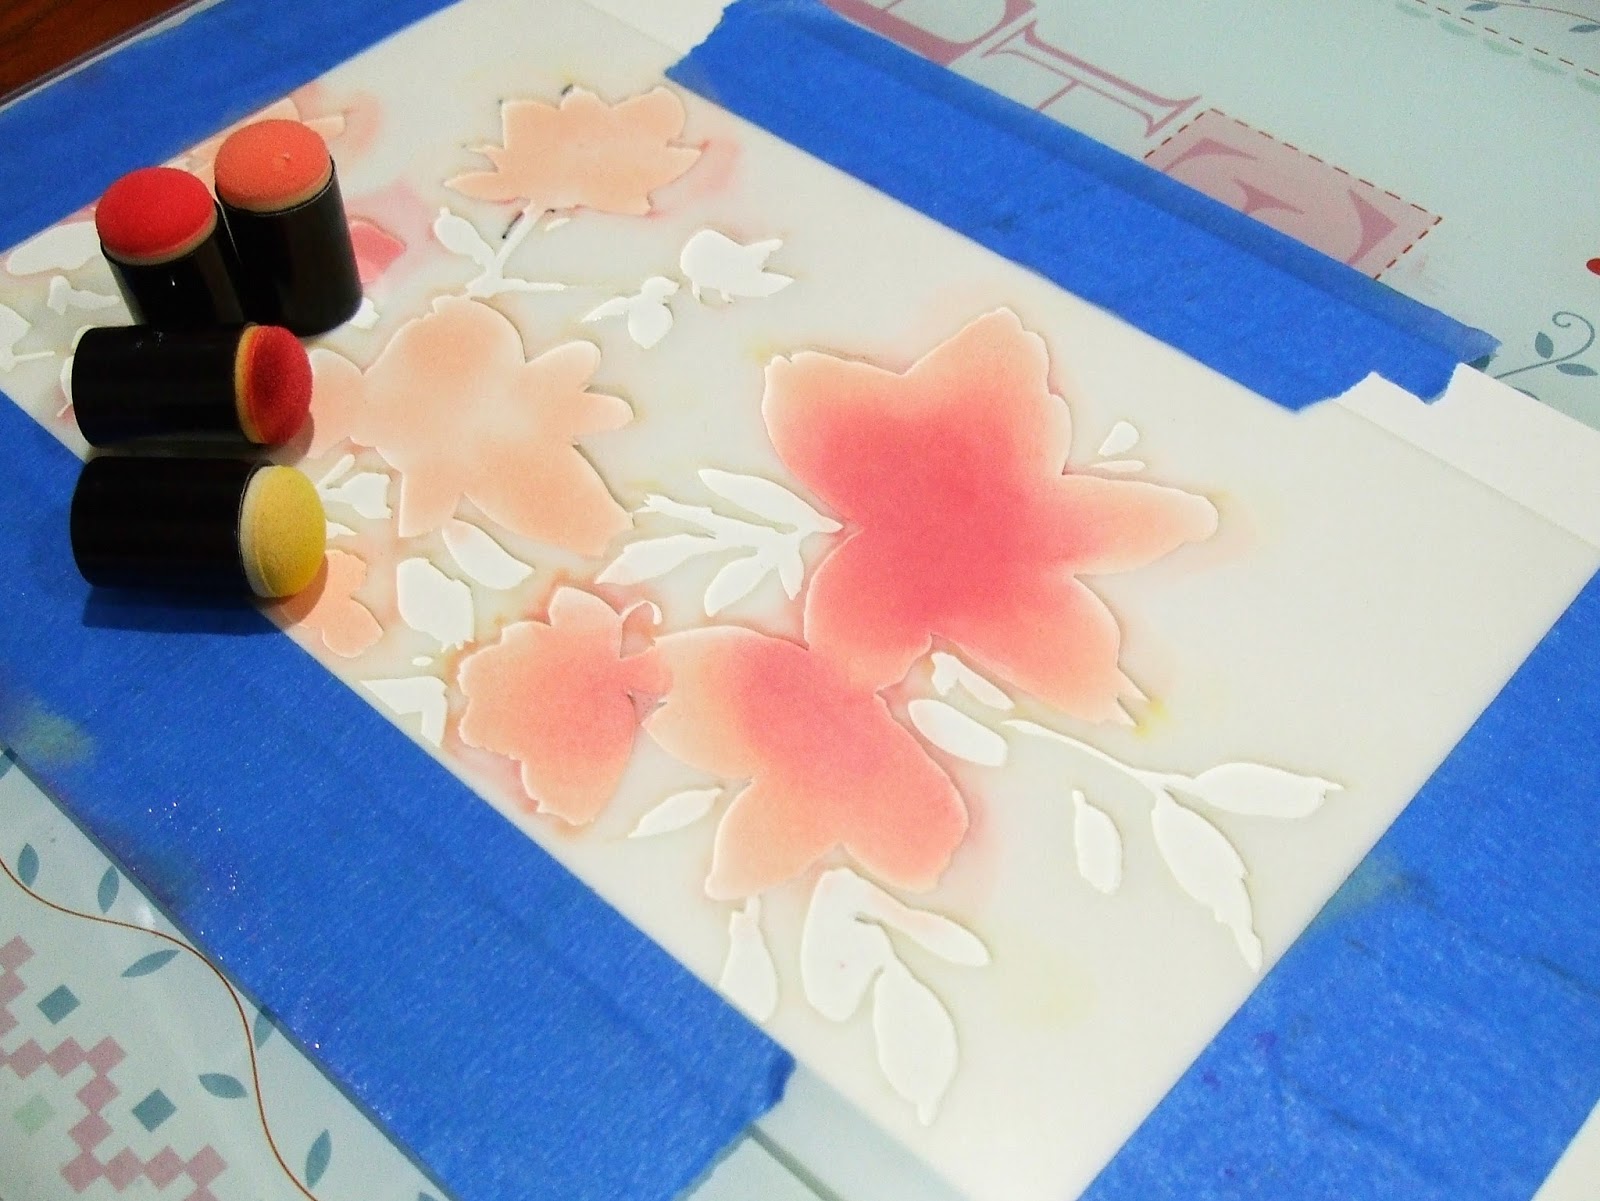
https://www.youtube.com/watch?v=o_Umn06_IfU


For my colouring:

I have used Citrus Burst and Purple wine to Colour my flowers and for my leaves I have used Citrus Burst with sweet leaf.
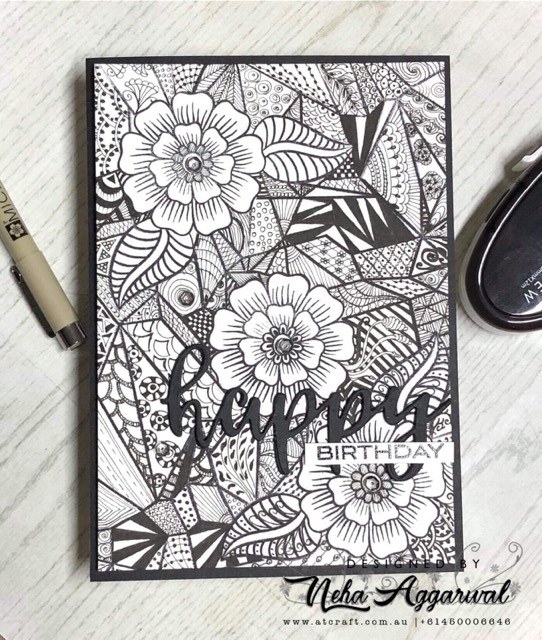
Putting Together:

For my base I cut a black piece of card stock which is 4.25'x 5.5' and stuck the back ground which I created and is slightly smaller than black.

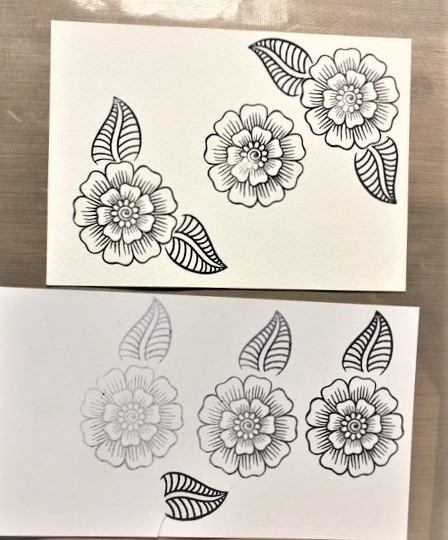
Then I arranged all flowers and Leaves the way I wanted .

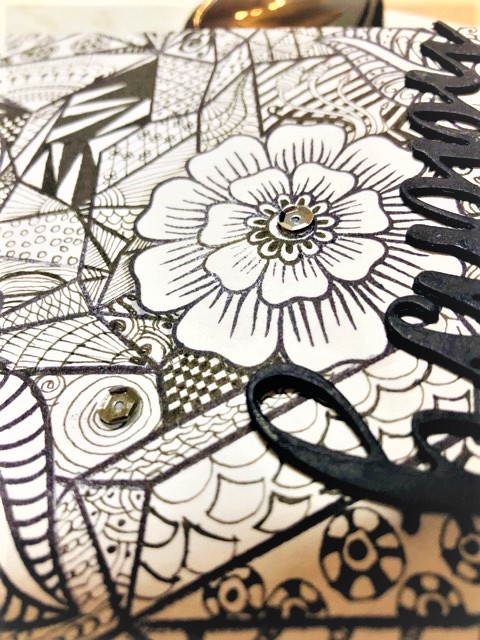
One of the flower which is on the top is stuck with the foam tape to give dimensions.

I heat embossed word thanks with white embossing powder, for the stamp I have used thank you word from the set called Many Thanks.

I have also used couple of water drops to give it a fresh look .

And lastly to finish my card I took a fine black pen to create a border around the area.

Prizes:

Altenew is giving away a $30 gift certificate to 3 lucky winners! Please leave a comment here on the Altenew Card Blog(https://wp.me/p6Dps1-bBV) by 6/17/2020 for a chance to win.

We’ll also draw a winner to receive a $15 Altenew gift certificate from the comments left on each designer’s blog on the blog hop list below. All winners will be announced on the Card Blog on 6/21/2020.

There’s MORE! We will pick 2 of our favorite handmade creations from those who joined the linky party and they will each receive a $15 Altenew gift certificate!

Special offer:

FREE U.S. shipping with code HAPPY6T or $5 OFF international shipping with code SHOPPING6T at checkout on orders over $29. Offer valid from 6/10/2020 at 12:01 am EDT through6/11/2020 at 11:59 pm EDT. Shop HERE! Not valid on prior purchases. Cannot be combined with other promo codes. Not valid on Altenew Academy Classes and Virtual Workshops.

This is no ordinary hop! We want you to join in on the fun as well. There is a Linky Party going on at the Altenew Card Blog. All you have to do is link up your creations based on the theme of the hop, which is, “Giving Thanks” and mention that you are taking part in the Altenew Educators Blog Hop and Linky Party. So what are you waiting for?! Link up!

Hop list:

Altenew Card Blog

Nenette S. Madero

Christine Pennington

Vicki Finger

Amy Hill

Nandini Karmarkar

Nancy McClelland

Neha Aggarwal (YOU ARE HERE)

Terri Marie Koszler (NEXT HOP)

Rosie Neustaedter

Helen Kalb

Laurel Beard

Maryam Sharara

Teri Stokes

Nicole Watt

Erin Thompson

Irina Fonina

Amber Rain Davis

Patty Mello

Virginia Lu

Thank you for Stopping by.

Please do leave me your beautiful comments , to really boost my morale .

Your Next stop is with beautiful Terri Marie Koszler

Regards

Neha

Read more
Altenew Creative Watercolor Media

Altenew Creative Watercolor Media

Hi Everyone,
Today I am here to show one more project for Altenew. For this purpose I have selected another one of my favorite Class Creative watercolour Media.
For this project I wanted to try and improve my coloring techniques by using the Altenew Watercolour Palette and Altenew Water brush Pens.
I have used the stamp sets Build-A-Flower: Anemone Coronaria and for the sentiment I chose my "happy" word from the Script Words 2. " for you" is from the halftone happy stamp set.

Basic Techniques and Process for making this Card:

  • For making this card , I have used the basic technique of masking.
  • First I planned how many flowers I want on the top and then stamped them randomly on my strathmore Watercolor Paper Cold press using distress ink Antique Linen.
  • Once I have got my top flowers I masked them with the flowers which I got by stamping them on a paper separately and fussy cutting them out as I wanted no white background in the flowers.
  • I have done the same techniques for the leaves as well and masked few to see the over lapping ones coming underneath the flowers.
  • After I was happy with my stamped images I started my coloring process.
  • Foremost I did a brown water wash outside my outline images. So spreading the brown outline with more water.
  • Then slowly and patiently I started doing every alternate petal at a time so that they are not wet as when I do the petal in between the two I did before.
  • For the middle of the flowers I did black dots with watercolor.
  • For a bit of enhancement I also splattered some white with my brush.
  • My sentiment "happy" was cut two times on white card stock and 1 pcs in gold glitter card stock to have a raised effect.
  • "for you" I stamped with the Altenew New Antique Gold Pigment Ink on a black card stock.

Its amazing when you are challenged with something out of your comfort zone and try something new. I really would like to Thank Virginia and Erum for their support and love.
I look forward to create more and present myself more under their beautiful guidance.
Hope you all like it.

Regards

Neha

Read more

Altenew Zentangle for Cardmakers

Zentangle for cardmaker! what an amazing class it was. I have done few cards before with zentangle but never had a chance to finish them. Few tips and tricks learned with Amber Davis at the Altenew Academy was just on spot to full fill all needs.
Today I created a card with Zentangle. For this Card I have used the Geometric landscape which is a new release from Altenew. As soon as I saw this stamp I thought this would be perfect to do some zentangle. Along with this stamp I have also used Altenew Henna Element set.
So here I am with my card.

Here is the process on how I have created this card.
First I took a stamp from the Henna element and stamped them in a diagonal pattern on Nina Solar white along with its leaves. On a masking sheet I stamped flowers and leaves to cover the stamped images which I stamped on Nina solar white.

Now comes a bit of tricky part. The stamp was 6x6 so I had to bit struggle and expanding my lines with geometric pattern, I made a boo-boo but with Zentangle everything was hidden. First I stamped the 6x6 Image pattern and then I moved my paper little on right side so that I can stamp the 1/4 of the stamp again .Below is my picture which will show you what exactly I did.

All the lines which went missing from my this image I did create them when I started with my zentangle on it.
Once everything was finished I managed to die cut my sentiment happy cutout 4 times on a back cardstock to layer them on top of each other and used "Birthday" from Birthday builder stamp set.To finish it I just added few bits of sequins to add sparkle to finish.

Hope you all like my card and would love to join Amber for her beautiful class for some more fun and learning.

Untill next time.

happy Blogging

regards

neha

Read more

DT Tracey....Stencils

Hey Everyone, I'm back to share another project using "Stencils"........which is our theme for the month.
I have used "Altenew Floral Drape" Stencil to create the background on this layout. It is the same stencil I used on the card I shared a few weeks ago.
Its been a lot time since I created a double page layout!
I used a dauber and chalk inks to add colour to the stencil. The Pretty flowers and leaves are from "Altenew Beautiful day" stamp set. I only used the outline stamp .........I then used an aqua brush and Gelatos to create a soft water colour effect to colour in. A few colour shine spatters, a sprinkle of sequins, wood veneer butterflies, and doilies with a tiny heart button...........lots of my favorite bits and pieces
Happy Crafting x
Read more

DT TRACEY

Hey Everyone,
We have a fun theme for the month of June...."Stencils"
I have created a very Simple or Cas Style card using "Altenew - Floral Drape Stencil
I first used painters tape to secure the stencil to the paper. I used different chalk ink to blend the colours with daubers onto the stencil design..
After the design was all inked, I cut the paper to my card size, mat it with coordinating card stock, then to a white card base.
I splattered some extra ink over the design and a few sequin to finish it off.
"Thank you" sentiment is from Altenew Painted rose.
Hope this has given you more ideas on how you can create with your stencils
Happy Crafting
Read more

DT Teresa - Mother's Day

Hello Everyone!
Today I am sharing a cheerful card for Mother's Day, our theme for the month of May.
This card uses Neenah Classic Crest 110lb Smooth Solar White Cardstock for the base which is cut with a paper trimmer at 4 1/4" x 11" and scored with a teflon bone folder at 5 1/2" to make a top folding card of 5 1/2" x 4 1/4".
I stamped the Simon Says Stamp Circle Doodle Background inVersamark Ink onto a piece of 5 1/2" x 4 1/4" Strathmore Bristol Cardstock after using the EK Tools Powder Tool to guard against stray embossing powder. I then covered the stamped background withRanger Clear Embossing Powder and heat set the powder with aWagner Heat Tool.
I then chose colours of the rainbow from my collection of Zig Clean Color Real Brush Markers and painted the rings of the circles on the card in ROYGBIV (red, orange, yellow, green, blue, indigo, violet) order and I threw pink in there too, for good measure! I lay down a small amount of each colour in a ring and then blended out the colour using a Zig Wink of Stella Brush Marker which created a shimmer all over the card. The shine of the embossing powder and shimmer on the colour looks beautiful, but difficult to capture in a photograph.
I die cut butterflies using Pretty Pink Posh Blissful Butterflies Coordinating Dies from the coloured cardstock, once it had dried and with the same die I also cut some butterflies from a black foam sheet using the Sizzix Big Shot Machine. I allowed the foam cut butterflies sit over night to allow them to bounce back into shape after being compressed in the Bigshot Machine before adhering them to the bottom of the coloured butterflies with Ranger Multi Medium Matte.
I cut a triangle away from the coloured piece and adhered it withKokuyo Glue Tape Roller to the bottom of the left hand side of the card front and cut a strip of Simon Says Stamp Cardstock in Doll Pink and two thin black cardstock strips to run down the length of the triangle. On to the pink strip, I stamped the sentiment from Clearly Besotted Message Me in Versamark Ink and embossed it withRanger Embossing Powder, White and placed the three strips on to the card front using Ranger Multi Medium Matte. I placed Auzz Trinklets N Crafts Dew Drops 6mm on either side of the sentiment, again using Ranger Multi Medium Matte, which is not at all visible under the clear domes once it has dried. The foam-raised butterflies were then placed onto the card front.
To complete the card, I cut black cardstock into a card front-sized rectangle from My Favorite Things Blueprints 16 with the Sizzix Bigshot and then lay the rectangle die from My Favorite Things Blueprints 13, ensuring it was centred onto the larger die cut rectangle and ran it through the Bigshot once again. This left me with a narrow frame which I glued onto the card as a finishing touch.
Thankyou for following along with me today. Please feel free to ask questions if anything needs clarifying. If you cannot find the items I have used (listed below) in the Auzz Trinklets and Crafts store, be sure to drop Neha a message via email or Facebook and she will do what she can to order the product in for you.
Happy crafting and have a great day!
Teresa
Products used: Neenah Classic Crest 110lb Smooth Solar White Cardstock
Paper trimmer
Teflon bone folder Simon Says Stamp Circle Doodle Background Versamark Ink Strathmore Bristol Cardstock EK Tools Powder Tool Ranger Embossing Powder, Clear Wagner Heat Tool Zig Clean Color Real Brush Markers, 60 pack No. 022 Carmine Red No. 070 Orange No. 050 Yellow No. 041 Light Green No. 031 Cobalt Blue No. 030 Blue No. 081 Light Violet No. 025 Pink Zig Wink of Stella Brush Marker Pretty Pink Posh Blissful Butterflies Coordinating Dies Black foam sheet Sizzix Big Shot Machine Ranger Multi Medium Matte Kokuyo Glue Tape Roller, Permanent Simon Says Stamp Cardstock, Doll Pink Black Cardstock Clearly Besotted Message Me Ranger Embossing Powder, White Auzz Trinklets N Crafts Dew Drops, 6mm My Favorite Things Blueprints 16 My Favorite Things Blueprints 13
Read more

Happy Mothers Day

Hey Everyone,
Its Tracey back with you to share my first project for the Month of May........Our Theme is Mothers Day.

My Mum loves the colour orange.......I created this card for her using 'Altenew Brush Art Floral'

I used chalk inks to stamp the flowers and leaves. The heart shape card was die cut with my cricut using 'Lifes a Party' cartridge. I used foam to mount the top layer to the card for added dimension.
A splatter of gold colour shine and a few sequins.
More flowers inside.
I've had this stamp for ages.....I'm using here for the first time. I really like the shape of the flowers! I think you are going to see it a lot more
Happy Creating
Tracey
Read more

DT Tracey Shabby...shaker

Hey Everyone...I hope you enjoyed your easter break!
Its Tracey back with you to share my second project for this months theme "SHABBY"
I created a Shaker card.
First up I used my fuze tool to make a pocket......I'm not sure what I'm doing wrong but it did not work that well. So.... out came my sewing machine. I think the stitching looks a little more shabby any way with the odd thread hanging. I stamped the bird branch image on the pretty pink pattern paper then inserted it and lots of shaker mix to the pocket before stitching it closed.
Happy is die cut and glued to the front of the pocket, a little washi tape, a stamped sentiment and my fav crochet doilies.
Happy Crafting
Read more

DT - Neha A quick and easy shaker Card

Hello everyone

After a long time I am here writing a post . Recently I have gone to do my craft stand at a show where I was suppose to do a quick $5 make and Take . I was very worried what should I do . Suddenly I saw few Queen & Co's Foam shaker kits which were hanging on the self in my shop . And was thinking what should i do with them . So quickly I grabbed some of the papers from my craft room which I bought long time back from Aldi store . And I also got one of the shape kit from the Store as well to prepare a quick shaker Card .

And so after I prepared the result was amazing. I ended up preparing 59 kits and all my 50 kits were sold out at one day stand. Amazing and everyone liked it as well.

The Products which I used are linked here.

https://atcraft.com.au/shop/shaker-elements/queen-co-foam-front-card-kit-lines-free-shipping/ https://atcraft.com.au/shop/shaker-elements/queen-co-foam-front-card-kit-bubbles/ https://atcraft.com.au/shop/new-items/auzz-trinklets-n-krafts-shaker-mix-candy/
Read more